The everyday life of an amateur Mother, gardener baker and cook.

Monday, August 29, 2011

Spoiled Squash Part 2: Return of the zucchini!!!


Well I now know to never give up! If you read my earlier post about my squash I actually almost pulled them all up because they were taunting me with their yellow leaves and puny vines. But, alas they have returned!! I have acorn squash, zucchini, and even a little cucumber!! My pumpkin is growing like its creating a magical carriage to take Cinderella to the ball, it has 3 small pumpkins on it and more coming!


pumpkin...can't even get it all in the shot!

I'm not to sure if anything will actually ripen enough before the cold sets in, but I may at least get to eat a baby zucchini or a baby cucumber. I think with the pumpkins I will pick all the new growth so the plant can put its energy into creating a couple of MONSTERS for Halloween.


baby cucumber (maybe good for one dill pickle??)

Now I'm torn for next year! I was sure the bark mulch was ruining the plants, but perhaps it was just the transplanting and then the serious lack of sun this spring? Do I put them there again next year? I think I  may have to wait to see how many garden boxes I can get out of my Husband!!

For now I will bask in the glory of my revitalized squash and worry about next year......well, next year!


One thing I know though is that I will never give up again on my little plants!! And, its amazing what a little sun can do to garden, perhaps it was a bad year for me to start experimenting with my veggies, with our serious lack of sun and warm weather. All I know is next year I am one more step ahead, and maybe one day (in the far future...) I can claim to be a pro!!

acorn squash

Saturday, August 13, 2011

Peas, Glorious Peas!!!

Well my first attempt at a veggie garden has taught me many things. First of all, I need more sunshine for almost all my plants. The exception to that? My peas!!


My peas have turned out some kind of wonderful and everytime I look at them I want to sing, "peas, glorious peas!", to the tune of "food, glorious food!" (from 'Oliver' for those who think I have gone nuts...) The reason they have grown so well is they have the ideal amount of sunlight, sunny in the morning and evening without the hot midday sun. Either that, or Elysabeth has a magical touch, as she was the one to plant them!


My only regret is that I should of grown a whole garden box full, not just a few rows. I planted the first rows just before May long and the second rows a couple of weeks after. We have been enjoying them now for a couple of weeks and they are so superior to frozen peas. Also, they are fun to pick and shell for the girls and I only lose a few to some hungry little mouths along the way!!


I am yet to come up with some clever recipe in which to incorporate them, so stay tuned, but for now we like them just plain ol' steamed, I kind of don't want to mess with a perfect thing.


Next year I am hoping to plant enough so I can freeze them, I also want to plant enough of everything so I can really save on groceries! With two growing girls, (I swear girls can eat as much as boys) and us I will do anything these days to save a few bucks at the grocery store! Oh, did I mention I am sooooo into couponing these days? But that's another post I think.....
What I will say is, "Mr. Hillis, I need a deep freeze and more garden boxes!!" Now I will sneak off to bed so I don't have to deal with the repercussions of this statement till tomorrow...ha ha ha....

Wednesday, August 3, 2011

60 cupcakes!!

Well, this last weekend I had my first attempt at making 60 cupcakes! I haven't ever actually made more than a couple dozen, but I had two events on the long weekend so I decided to go for it.

Here is the lot! Minus a few casualties that we had to sample of course...


6 hours and one frazzled Mother later, I had completed this wondrous feat! I don't remember the last time I wore an apron all day and to be honest, I'm sure now I would never make it as the next Martha. The time and effort, although worth the outcome, is tedious! The very act of just getting them baked took over two hours! Then I had to make the fillings, put the filling in, make the buttercream and decorate. Needless to say I am taking a cupcakes break! Well, actually there was this recipe I was maybe going to try...hmmmm.....

So my tips for anyone who wants to tackle this challenge? Here they are...

  • Be prepared to be fully stocked in ingredients. I used 16 eggs, 2 lbs. of butter, 4 cups of milk, 5 peaches, 1 lb. of blueberries, 6 cups of flour, about 5 cups of sugar and a package of chocolate chips. (not to mention small quantities of other things)
  • find a babysitter for all children who require attention (so like any children), mine are great beater lickers and taste testers, but they may have watched some cartoons this day...
  • get ready for a HOT kitchen! with the oven on for so long I had to open all the windows and wait awhile to make my buttercream so it wouldn't melt!
  • don't stress when you over mix your batter and it tastes a but funny, you already made a double batch of it anyways and you can always use extra buttercream!! (this is what I told myself as I sampled my first cupcake out of the oven...)
  • And always make extra buttercream!! (Darn it!!! I ran out of butter and time, and these cupcakes could of used a little more icing.)
  • have fun!! I mean, this is why we do it right??!! Its all in the learning!
All in all it was a lot of fun and I felt pretty proud looking at my accomplishments. And over two nights and two parties, and a bit of sampling at home, they were all gone but a couple!
Thanks to all my wonderful family who gobbled them up, despite the slight baking soda taste and lack of buttercream! I love you all for eating my creations :)

Here is the vanilla cake recipe I tried, it was good, but I did over mix it. Because I made a double batch my bowl wasn't quite large enough and mixing was a bit of a challenge. (This just proves that I soooooo need a kitchen aid mixer!) I think I will try it again next time as I did like the texture of the cake.

http://52cupcakes.blogspot.com/2006/05/billys-vanilla-vanilla-cupcakes-with.html


This fillings I made myself. I just cooked up the fruit and mashed it, added some sugar, and cornstarch mixed with water to thicken, then after it was cooled I put it in the cooled cupcakes. This time was my first time putting the filling in with the piping bag, and it was definitely faster, but the downside was that the chunks of fruit got stuck and it was hard to tell how much filling I had got in. I usually cut out a cone shape, spoon the filling in, cut off the bottom of the cone, then place the top of it back on. This is more time consuming, but better results I think.

The buttercream was the same as my last cupcake recipe and was oh so yummy yet again! But, I should of made more, you can never have too much buttercream!

http://kristin-amateurmother.blogspot.com/2011/07/chocolate-cupcakes.html

So, would I do it again? Absolutely! Although I don't think I could handle it as a weekly occurrence, it certainly was fun and another great experience in my quest for the perfect cupcakes.

Here they are... Both vanilla cake, one chocolate buttercream and blueberry filling, the other vanilla buttercream and peach filling.


I also added some fuzzy peach candies to the top, which I believe made these the most popular ones!
Now, what kind can we do next........

Thursday, July 28, 2011

Craving some bacon carbonara??


Mmmmmmmm bacon!! For the past couple of days I have been craving a salty something. I bought some salami for a yummy sandwich, but alas, it did not curb the craving. Then a couple of nights ago I was watching "Master Chef" and one the the chefs whipped up a little tasty looking carbonara, "that's it!!" I thought, "that will surely put my mind and body in a happy place!!

I am lucky enough to get to eat at my parents house quite often, when the Husband works nights and I'm too lazy to cook, I head over there. As yesterday my Mom was going to be the chef I tossed the subject out there, "bacon Ma?" Well, the apple doesn't fall far from the tree you know, of course she agreed.


Now, I get a lot of my cooking skills and tips from my Mom, which is why we work so well in the kitchen together. We kind of just do without thinking and usually our end results are quite good .Neither of us had ever made a carbonara, but my Mom and I both are into this 'trying of new things' mode lately, so we dove in.  Also, my Mom, just like me, likes to read a bunch of recipes then decide which parts sound the best out of each and throw them all together. So that's what we did! Below is our very own version of what we thought would work the best, and it turned out super yummy, enjoy!


Bacon Carbonara


Ingredients:

1 cup of grated parmesan cheese
3 eggs
1/3 cup whipping cream
1 tbsp olive oil
1 package bacon
1/4 cup chives
noodles of your choice, we used spaghetti

Cook up your bacon and get your noodles on too, this is a quick dinner! Once the bacon is cooked, dice it up. Drain the fat off from the bacon pan but leave the bits on the bottom of the pan.


I had to document this pan because it brought up the only disagreement we had. I said it was too burnt, but Ma said it was OK.... Ma was right.......

Then whisk together the cheese, eggs, olive oil and whipping cream in a bowl.


Another sign I am my Mother's daughter? All the recipes we saw said amounts less than 1 cup of parm, but my Mom says "nothing wrong with extra cheese!".


Once the noodles are cooked add them to your bacon pan, (which is off the burner and cooled down) and stir it all up. The hot noodles should help to scrape the pan of all it's bacony goodness.
While the noodles are still hot add your egg mixture and stir. The heat from the noodles will cook the eggs a just enough so the sauce is a nice, not to runny, consistency.

Add you bacon and chives to this.


We served ours with my Mom's new Mediterranean chickpea salad (you will have to get that one from her) and some yummy crusty bread. It was perfect!!

All said and done I was curbing my appetite in about half an hour. The only thing that makes a meal better (besides cheese of course) is when I can cook it fast, love it!!

Saturday, July 23, 2011

Cream Cheese Icing (oh, and carrot cake too...)

How can we improve already yummy icing? Add cheese I say! Seriously, is there anything that cheese doesn't go with? Today, spur of the moment of course, we decided to stray from the norm and whip up a carrot cake. This way I can tell myself that it's not really dessert, but actually a serving of my daily veggies, I almost had myself convinced too, until the cream cheese icing!

The cake recipe I got from a book titled "A Piece of Cake" by Susan G. Purdy. I took it out from the library and it has been an old fashioned kinda book, but still some good tips and cakes in it. The actual cake was ok, could of been a little more moist I think...
The icing I just kinda made up myself, and there was A LOT of it, so maybe even half the recipe below would suffice.
So here it is, carrot cake with cream cheese icing!


CARROT CAKE

Ingredients:


Flour, 1 cup
baking soda, 1 tsp
2 eggs
sugar, 1 cup (turned out pretty sweet, like 1/2 cup would prob do...)
vegetable oil, 3/4 cup
vanilla, 1 tbsp
cinnamon, 1 tsp
grated carrot, 1 1/2 cups
ground flax, 3 tbsp (the recipe called for wheat germ, but I only had flax)
crushed pineapple, 3/4 cups and walnuts, 1/2 cup (I had neither of these, so we went without!)

Preheat oven to 350.


First I mixed the eggs, sugar, oil, vanilla and cinnamon with the hand blender.


Then I sifted in the flour and b. soda, added the flax (not in the sifter cause it would get stuck!), then tossed in the carrot. I gave it a quick stir to blend and placed it in my greased baking pan. The recipe said to "rub shortening" all over the pan, but I opted to give it a quick spray with the canola oil and it worked great.


I then tossed it in the pan then in the oven at 350 for 40 minutes. I feel like I should of maybe pulled it out 3-5 minutes earlier, so check at 35 minutes. Let it cool completely.


While it was cooling I made up the icing. Its so super easy!


CREAM CHEESE ICING


Ingredients:


1 package cream cheese, softened to room temp
4 cups powdered sugar
1/2 cup butter, room temperature as well, but not melted!!!
1 tsp vanilla

Throw in bowl
Mix with hand mixer
Lick beater........and bowl.......


Next I sliced my carrot cake in half so I could not only top it with the cream cheese icing, but also layer it, the more the better!!
I had to let it cool again so as not to melt the icing when I put it on.


I then spread out the cream cheese goodness both in the middle AND on top!!


All that is left to do now is enjoy!


Thursday, July 21, 2011

Not yo' Mama's Meatloaf

Meatloaf... We all know it's got a bad rep, greasy loaf, straight up meat, maybe some ketchup... Well my friends say goodbye to the ghetto meatloaf of your past and hello to meatloaf a la 2011!!!
Easy peasy to make, quick to cook and great if you are having one of those "what the heck to make for dinner cause I'm lazy" moments.

I kind of threw whatever in it, but any veggies would go, and I used ground beef, but ground turkey would work too.

Not yo' Mama's Meatloaf


Ingredients

Ground beef
2 eggs (I started with one, but upped it to two cause of all the extra veggies I put in)
Worcestershire sauce, about 1/4 cup
garlic powder, few shakes
ketchup, about 1/2 cup
breadcrumbs (I make my own from all my bread ends that no one in the family eats, just save them up in the freezer and bake at a lower temp, 275ish, till toasted) Also, make sure you crunch them up so the crumb is fine, a few bigger bits are ok though...
parsley, rosemary, thyme, a few sprigs of each  (I grabbed mine from the garden, but dry would be ok too)
veggies: I used, grated carrot and zucchini, finely diced mushrooms, finely chopped kale and grated onion.
S & P


Mix all your goods into the bowl until all blended up.
I put mine into a muffin tray cause I thought it would be more fun for the kids, but a loaf pan works too.


Add some ketchup on the top, cause it makes it kind of sticky, sweet and yummy!


Toss in the oven and bake for about 25 minutes.

And here you have it, meatloaf that is a far cry from your Mom's. Also great for kids who have a dislike to veggies, (they wont even know they re in there, shhhhh...) We served ours up with rice and some fresh tomato and cucumber, I believe we all finished our plates!


Saturday, July 16, 2011

Chocolate Cupcakes!!!

OK, I am so so excited to tell you about my latest creation, these are by far the best cupcakes ever created by moi! Finally a balance of moist cake and way too yummy icing, you are for sure going to want to make these ones......
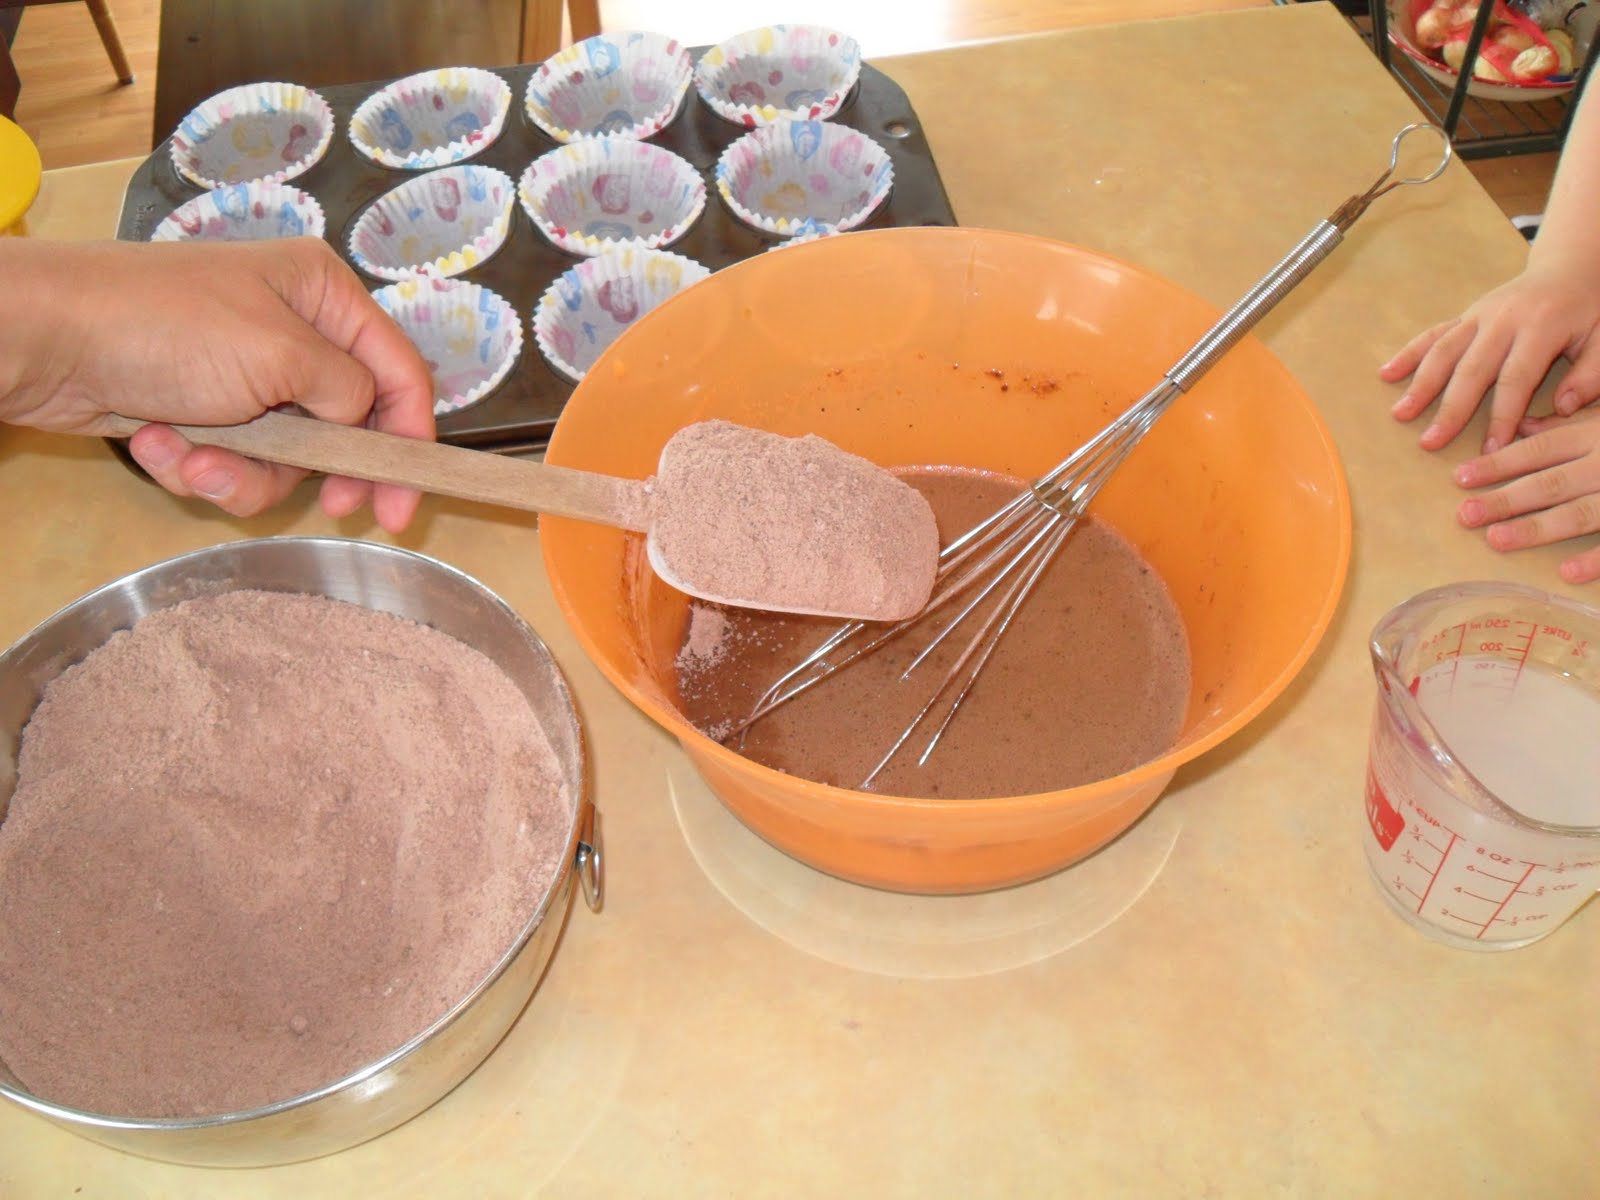


May I remind you that it was two months ago or so was when I started the quest for cupcake perfection. Everyone who reads this MUST be confident that they too can do this! Don't leave it for Martha, I swear anyone can make these! I always have loved baking and never buy muffins, cookies or brownies, but for some reason cake was always harder for me and I relied on ol' Betty Crocker to save the day. No more my friends, no more!

Today, in honour of girls night tonight, I made chocolate cupcakes with a chocolate french buttercream. This is my second time baking this cake recipe and I love it! Super moist and yummy. This was my first shot at a chocolate french buttercream, but a few weeks ago was my first try at the vanilla french buttercream.
French buttercream is far superior to a regular buttercream I have found. It's super fluffy, creamy and melt in your mouth, and there is no crazy sugary taste either. A little more difficult to make, but if I can do it, you can!

So here it is.....

Chocolate Cake

(found this recipe somewhere, cant remember where as it is written down on a piece of construction paper covered in batter...)

This recipe is for 12 cupcakes

1/2 cup white sugar
1/2 cup brown sugar
3/4 cup + 2 TBSP flour (I used the cake and pastry flour, but all purpose is fine)
1/4cup  + 2 TBSP cocoa powder
3/4 tsp baking soda
3/4 tsp baking powder

1 egg
1/2 cup milk
1/4 cup oil (I used canola)
1 tsp vanilla
TIP: have your eggs and milk at room temperature, I didn't last time I made this but did this time and the cake seemed better..... 

1/2 cup boiling water

Preheat oven to 350

Sift all of the dry ingredients together and mix


Mix the wet ingredients, except the water!! (so...egg, milk, oil and vanilla) until combined.


Alternate the dry and hot water into the wet, stirring until just combined.


It will look pretty watery, this is ok!!

Fill up your muffin tins and bake for 20 minutes, check with a toothpick to see if it comes out clean.


Cool completely before icing!!!!

Now for the icing....

Chocolate French Buttercream Icing


1 cup unsalted butter (I only has salted, and it tastes good, but unsalted would be better)
(have butter softened to room temp and mush it up with a spoon a bit)

1/2 cup + 1 TBSP granulated sugar ( NOT powdered!!!)

1/8 tsp cream of tartar (I have never bought or seen this in my life, so I left it out, my icing was still fab!)

1/4 cup water

4 large egg yolks


Separate the egg yolks and beat them with a beater until they are pale and foamy, it took me about 5 minutes or so.

In a saucepan combine the sugar and water (also cream of tartar if you have it). Stir and cook over moderate high until the sugar dissolves. Turn up the heat a bit and bring to a slow boil. DONT stir while it gently boils, for 6-7 minutes. Have a brush and some water ready, you will need to wash down the insides of the pot as the sugar crystals form, do this several times while it boils. 

Take the pot off the heat (before the sugar browns) and slowly pour into the egg yolks. Try to line it up so the sugar doesn't land on the beater, it will form sugary crystaly threads. Beat for 8 minutes or so until fluffy and the mixture is cool to the touch.

Make sure that the bowl and mixture is cool, you don't want to melt the butter as you add it! I did this the first time and my icing was part yummy and part melted butter!

Add the butter a spoonful at a time and beat the heck out of it!

If you are making vanilla then you can add a tsp of vanilla and be done, but if you are making chocolate then see the next step.....

Melt about 100 grams of semisweet chocolate chips, or any chocolate really, into a double boiler. Here is my makeshift double boiler.....


Let the chocolate cool then beat into the buttercream...And tada! You have some super yummy, store worthy chocolaty icing....


Best part about baking!


I recently went all hardcore cupcaker and bought myself a piping bag, love it!!! But before that I just used a ziploc bag with a small cut in the corner to do my icing. If you check out my pirate cupcakes (scroll down), this is what it will look like, not too shabby for a ziploc bag!!

Here is the finished product. I dusted mine with some chocolate shavings for the full effect.


So, there you have it, you must must try these, seriously!!! The payoff is so worth it. Or just come hang out with me and eat mine:)

Happy cupcake making people!!