The everyday life of an amateur Mother, gardener baker and cook.

Thursday, July 28, 2011

Craving some bacon carbonara??


Mmmmmmmm bacon!! For the past couple of days I have been craving a salty something. I bought some salami for a yummy sandwich, but alas, it did not curb the craving. Then a couple of nights ago I was watching "Master Chef" and one the the chefs whipped up a little tasty looking carbonara, "that's it!!" I thought, "that will surely put my mind and body in a happy place!!

I am lucky enough to get to eat at my parents house quite often, when the Husband works nights and I'm too lazy to cook, I head over there. As yesterday my Mom was going to be the chef I tossed the subject out there, "bacon Ma?" Well, the apple doesn't fall far from the tree you know, of course she agreed.


Now, I get a lot of my cooking skills and tips from my Mom, which is why we work so well in the kitchen together. We kind of just do without thinking and usually our end results are quite good .Neither of us had ever made a carbonara, but my Mom and I both are into this 'trying of new things' mode lately, so we dove in.  Also, my Mom, just like me, likes to read a bunch of recipes then decide which parts sound the best out of each and throw them all together. So that's what we did! Below is our very own version of what we thought would work the best, and it turned out super yummy, enjoy!


Bacon Carbonara


Ingredients:

1 cup of grated parmesan cheese
3 eggs
1/3 cup whipping cream
1 tbsp olive oil
1 package bacon
1/4 cup chives
noodles of your choice, we used spaghetti

Cook up your bacon and get your noodles on too, this is a quick dinner! Once the bacon is cooked, dice it up. Drain the fat off from the bacon pan but leave the bits on the bottom of the pan.


I had to document this pan because it brought up the only disagreement we had. I said it was too burnt, but Ma said it was OK.... Ma was right.......

Then whisk together the cheese, eggs, olive oil and whipping cream in a bowl.


Another sign I am my Mother's daughter? All the recipes we saw said amounts less than 1 cup of parm, but my Mom says "nothing wrong with extra cheese!".


Once the noodles are cooked add them to your bacon pan, (which is off the burner and cooled down) and stir it all up. The hot noodles should help to scrape the pan of all it's bacony goodness.
While the noodles are still hot add your egg mixture and stir. The heat from the noodles will cook the eggs a just enough so the sauce is a nice, not to runny, consistency.

Add you bacon and chives to this.


We served ours with my Mom's new Mediterranean chickpea salad (you will have to get that one from her) and some yummy crusty bread. It was perfect!!

All said and done I was curbing my appetite in about half an hour. The only thing that makes a meal better (besides cheese of course) is when I can cook it fast, love it!!

Saturday, July 23, 2011

Cream Cheese Icing (oh, and carrot cake too...)

How can we improve already yummy icing? Add cheese I say! Seriously, is there anything that cheese doesn't go with? Today, spur of the moment of course, we decided to stray from the norm and whip up a carrot cake. This way I can tell myself that it's not really dessert, but actually a serving of my daily veggies, I almost had myself convinced too, until the cream cheese icing!

The cake recipe I got from a book titled "A Piece of Cake" by Susan G. Purdy. I took it out from the library and it has been an old fashioned kinda book, but still some good tips and cakes in it. The actual cake was ok, could of been a little more moist I think...
The icing I just kinda made up myself, and there was A LOT of it, so maybe even half the recipe below would suffice.
So here it is, carrot cake with cream cheese icing!


CARROT CAKE

Ingredients:


Flour, 1 cup
baking soda, 1 tsp
2 eggs
sugar, 1 cup (turned out pretty sweet, like 1/2 cup would prob do...)
vegetable oil, 3/4 cup
vanilla, 1 tbsp
cinnamon, 1 tsp
grated carrot, 1 1/2 cups
ground flax, 3 tbsp (the recipe called for wheat germ, but I only had flax)
crushed pineapple, 3/4 cups and walnuts, 1/2 cup (I had neither of these, so we went without!)

Preheat oven to 350.


First I mixed the eggs, sugar, oil, vanilla and cinnamon with the hand blender.


Then I sifted in the flour and b. soda, added the flax (not in the sifter cause it would get stuck!), then tossed in the carrot. I gave it a quick stir to blend and placed it in my greased baking pan. The recipe said to "rub shortening" all over the pan, but I opted to give it a quick spray with the canola oil and it worked great.


I then tossed it in the pan then in the oven at 350 for 40 minutes. I feel like I should of maybe pulled it out 3-5 minutes earlier, so check at 35 minutes. Let it cool completely.


While it was cooling I made up the icing. Its so super easy!


CREAM CHEESE ICING


Ingredients:


1 package cream cheese, softened to room temp
4 cups powdered sugar
1/2 cup butter, room temperature as well, but not melted!!!
1 tsp vanilla

Throw in bowl
Mix with hand mixer
Lick beater........and bowl.......


Next I sliced my carrot cake in half so I could not only top it with the cream cheese icing, but also layer it, the more the better!!
I had to let it cool again so as not to melt the icing when I put it on.


I then spread out the cream cheese goodness both in the middle AND on top!!


All that is left to do now is enjoy!


Thursday, July 21, 2011

Not yo' Mama's Meatloaf

Meatloaf... We all know it's got a bad rep, greasy loaf, straight up meat, maybe some ketchup... Well my friends say goodbye to the ghetto meatloaf of your past and hello to meatloaf a la 2011!!!
Easy peasy to make, quick to cook and great if you are having one of those "what the heck to make for dinner cause I'm lazy" moments.

I kind of threw whatever in it, but any veggies would go, and I used ground beef, but ground turkey would work too.

Not yo' Mama's Meatloaf


Ingredients

Ground beef
2 eggs (I started with one, but upped it to two cause of all the extra veggies I put in)
Worcestershire sauce, about 1/4 cup
garlic powder, few shakes
ketchup, about 1/2 cup
breadcrumbs (I make my own from all my bread ends that no one in the family eats, just save them up in the freezer and bake at a lower temp, 275ish, till toasted) Also, make sure you crunch them up so the crumb is fine, a few bigger bits are ok though...
parsley, rosemary, thyme, a few sprigs of each  (I grabbed mine from the garden, but dry would be ok too)
veggies: I used, grated carrot and zucchini, finely diced mushrooms, finely chopped kale and grated onion.
S & P


Mix all your goods into the bowl until all blended up.
I put mine into a muffin tray cause I thought it would be more fun for the kids, but a loaf pan works too.


Add some ketchup on the top, cause it makes it kind of sticky, sweet and yummy!


Toss in the oven and bake for about 25 minutes.

And here you have it, meatloaf that is a far cry from your Mom's. Also great for kids who have a dislike to veggies, (they wont even know they re in there, shhhhh...) We served ours up with rice and some fresh tomato and cucumber, I believe we all finished our plates!


Saturday, July 16, 2011

Chocolate Cupcakes!!!

OK, I am so so excited to tell you about my latest creation, these are by far the best cupcakes ever created by moi! Finally a balance of moist cake and way too yummy icing, you are for sure going to want to make these ones......


May I remind you that it was two months ago or so was when I started the quest for cupcake perfection. Everyone who reads this MUST be confident that they too can do this! Don't leave it for Martha, I swear anyone can make these! I always have loved baking and never buy muffins, cookies or brownies, but for some reason cake was always harder for me and I relied on ol' Betty Crocker to save the day. No more my friends, no more!

Today, in honour of girls night tonight, I made chocolate cupcakes with a chocolate french buttercream. This is my second time baking this cake recipe and I love it! Super moist and yummy. This was my first shot at a chocolate french buttercream, but a few weeks ago was my first try at the vanilla french buttercream.
French buttercream is far superior to a regular buttercream I have found. It's super fluffy, creamy and melt in your mouth, and there is no crazy sugary taste either. A little more difficult to make, but if I can do it, you can!

So here it is.....

Chocolate Cake

(found this recipe somewhere, cant remember where as it is written down on a piece of construction paper covered in batter...)

This recipe is for 12 cupcakes

1/2 cup white sugar
1/2 cup brown sugar
3/4 cup + 2 TBSP flour (I used the cake and pastry flour, but all purpose is fine)
1/4cup  + 2 TBSP cocoa powder
3/4 tsp baking soda
3/4 tsp baking powder

1 egg
1/2 cup milk
1/4 cup oil (I used canola)
1 tsp vanilla
TIP: have your eggs and milk at room temperature, I didn't last time I made this but did this time and the cake seemed better..... 

1/2 cup boiling water

Preheat oven to 350

Sift all of the dry ingredients together and mix


Mix the wet ingredients, except the water!! (so...egg, milk, oil and vanilla) until combined.


Alternate the dry and hot water into the wet, stirring until just combined.


It will look pretty watery, this is ok!!

Fill up your muffin tins and bake for 20 minutes, check with a toothpick to see if it comes out clean.


Cool completely before icing!!!!

Now for the icing....

Chocolate French Buttercream Icing


1 cup unsalted butter (I only has salted, and it tastes good, but unsalted would be better)
(have butter softened to room temp and mush it up with a spoon a bit)

1/2 cup + 1 TBSP granulated sugar ( NOT powdered!!!)

1/8 tsp cream of tartar (I have never bought or seen this in my life, so I left it out, my icing was still fab!)

1/4 cup water

4 large egg yolks


Separate the egg yolks and beat them with a beater until they are pale and foamy, it took me about 5 minutes or so.

In a saucepan combine the sugar and water (also cream of tartar if you have it). Stir and cook over moderate high until the sugar dissolves. Turn up the heat a bit and bring to a slow boil. DONT stir while it gently boils, for 6-7 minutes. Have a brush and some water ready, you will need to wash down the insides of the pot as the sugar crystals form, do this several times while it boils. 

Take the pot off the heat (before the sugar browns) and slowly pour into the egg yolks. Try to line it up so the sugar doesn't land on the beater, it will form sugary crystaly threads. Beat for 8 minutes or so until fluffy and the mixture is cool to the touch.

Make sure that the bowl and mixture is cool, you don't want to melt the butter as you add it! I did this the first time and my icing was part yummy and part melted butter!

Add the butter a spoonful at a time and beat the heck out of it!

If you are making vanilla then you can add a tsp of vanilla and be done, but if you are making chocolate then see the next step.....

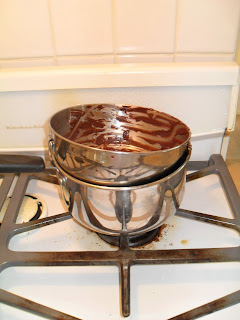
Melt about 100 grams of semisweet chocolate chips, or any chocolate really, into a double boiler. Here is my makeshift double boiler.....


Let the chocolate cool then beat into the buttercream...And tada! You have some super yummy, store worthy chocolaty icing....


Best part about baking!


I recently went all hardcore cupcaker and bought myself a piping bag, love it!!! But before that I just used a ziploc bag with a small cut in the corner to do my icing. If you check out my pirate cupcakes (scroll down), this is what it will look like, not too shabby for a ziploc bag!!

Here is the finished product. I dusted mine with some chocolate shavings for the full effect.


So, there you have it, you must must try these, seriously!!! The payoff is so worth it. Or just come hang out with me and eat mine:)

Happy cupcake making people!!

Friday, July 15, 2011

Spoiled Squash

Like I have mentioned, I really am an amateur gardener. I have spent years growing my garden in pots, so as we rented places I could be sure to always take my babies with me and although this got me a good start on learning, I am by no means a plant growing superstar....yet, that is!
 Now that we have our first home I will say I have certainly "dug" my heels into it full swing and I am finding that, surprise surprise, not everything is growing perfectly.

Like my squash.....

I started my squash in my garden boxes and they seemed to be doing ok, despite the cooler temperatures they were staying green and having slow growth. Then, starting with my pumpkin, they all began to turn yellow from the bottom leaves and up... I inspected for bugs, made sure it had water, then had it down to 2 things....Disease or not enough sun....

Everything I read said that squash need at LEAST 6 hours a day, and did I listen? Ummm, no. I figured that my kind of shady, 5 hour a day box would do the trick, but let me tell you people, not so!

Mistake #1 - I moved all the squash and the cucumber to my bark mulch hill. (I figured that it was super sunny and the mulch would help to keep them moist.) Turns out that bark mulch has no significant nutritional value and can actually alter the ph and nutrient levels.... Darn it!

Mistake #2 - I pulled of the bottom yellowing leaves off the plant in case of disease. This seemed to make the yellowing just spread faster to the rest of the plant.

Mistake #3 - Thinking I was smarter than all the literature and gardeners posting forums that I read.


So now this is what my squash all look like :(

Needless to say this had been a great learning experience and I now know that next year my squash will need a SUNNY, HOT spot that has good soil.

Sorry kids, no home grown pumpkin to carve this year!

What I should do is pull them all up and toss them into the compost, but instead I get to stare at them every time I head out to the backyard, a cruel reminder that I really am an amateur and its not just a clever name.

At least I was able to plant potatoes in that spot and they are doing fab so far! This is my second planting and we are already eating our first of the season from my other bed. Let me tell you, potatoes from the garden are FAR superior to store bought and so easy to grow!!


Well, I am sad about my squash but at least I got potatoes!

Happy Friday to you all!!

Thursday, July 14, 2011

All Hail the Kale!!

 Kale..... Yummy I say! My family??? Well, I have my Husband aboard but the kids are yet to convince. Here is my little kale patch in the garden. It has been doing very well this summer, as most of my cool temperature loving veggies. Perhaps there is something good about this cold summer?!!

So, if you read my earlier post you will know this day started a bit crazy! A split lip interfered with my painting, cleaning and cooking plans, but I got one of three done at least(cooking that is!). Also, I am happy to say Kayleigh did not need any stitches, I think that my sigh of relief was so large the doctor thought I might cry!
Anyways, back to kale.....

Normally I make a kale salad, see recipe below...super yummy, but only my Husband and I will eat it, the raw kale is a funny texture for the girls, and they make that "I don't think so Mom" face. So today I thought I would try baking the kale like chips. I started like usual, searched the internet till I found a collection of recipes that both sounded yummy and included ingredients I already had. This last point is especially important as I am way too lazy to drag the kids to the grocery store for no reason! Then I decided that I wanted cheese on mine, cause who doesn't like cheese? And also, I have a small addiction to cheese...any cheese...at anytime.........really...
So, here it is... my interpretation of kale chips, pretty awesome....just sayin'!

Baked Kale Chips

Ingredients
Kale (obviously)
1 TBSP olive oil
 salt
paprika
garlic powder
2 TBSP finely grated cheddar cheese
(I used cheddar because that was what I had, but parmesan would be better..)

Heat oven to 350

First I washed up my lovely little batch of kale from the garden, then dried it super well. An important step, because we don't want any steam while cooking, steam = soggy chips.


use this side for your cheese....


Next I put it in a bowl and drizzled about a tablespoon of olive oil over top. Then I massaged the oil in so it was spread to all the little nooks and cranny's. I placed these on a tinfoil lined baking sheet and sprinkled my finely grated cheddar on top.

Bake for about 10 minutes, or until crispy, but not too brown or they start to taste a bit like overcooked broccoli! I also used the convection to crisp the cheese on top, worked very well!
Meanwhile mix up a couple shakes of paprika, garlic powder and salt in a bowl... This is how much I made and it was waaaayyy too much, I used about 1/3 of this.


Sprinkle this on your cheesy kale chips and voila! Yummy, yummy yummy.....
They turned out crispy, cheesy and delicious! Only one piece was a little soggy, but I think the oils from the cheese made it so, next time...parmesan for sure.
 
Kayleigh gobbled them up like potato chips! Elysabeth, not so much, pretty sure she associated them with kale salad and wanted nothing to do with them. The Husband? Not sure yet because he wont be home till tonight, however Kayleigh and I just may eat them all up before he gets here!

So, survey says? Yes, I would make these again, half kid approved and very Mom approved! Here is my kale salad as well for anyone who wants to check it out.....

Kale Salad

Kale
Balsamic vinegar
Olive oil
fresh grated Parmesan
pecans cherry tomatoes

Chop up the kale fairly finely and place in a bowl
Drizzle oil and vinegar over top, sprinkle some parm and soak for a couple hours in the fridge
Place kale on plate
Cut cherry tomatoes in half
Sprinkle more parm ( I said I loved cheese!)
put pecans on top and serve!

Good luck with your kale adventures! If you have any other kale recipes let me know, I still have tons in the garden. And in case you didn't know how good kale is for you, here is a link http://www.nutrition-and-you.com/kale.html.
Happy cooking!!!


Plans changed....

So my plan for today was to have my first go at creating some yummy kale chips, I have an abundance in my garden and my kale salad I make is getting old fast! However.....
My little Kayleigh has managed to split her little lip wide open and I find myself now planning a trip to the clinic.. Fingers crossed she doesn't need stiches because I seriously dont know if I can handle watching that! I would get Dad to do it, but he is off to work and Im certain my Mother will not take part in holding down a child!

Stay tuned... If all goes well at the doctor I will post on my success or failure with the kale chips!

Wednesday, July 13, 2011

Strawberries and Pastry

So far my summer in the garden has been so rewarding. I am lucky to have a wonderful Husband that basically turned 1/4 acre of overgrown mess into a gorgeous lawn and veggie garden. My only complaint? (sorry Mr. Hillis...) I need MORE veggie growing room! But we will leave that till next season....

One thing we did not have to create ourselves is the strawberry patch. We have been so fortunate to have LOADS of fresh strawberries, which subsequently has lead to a lot of baking with the yummy berries.


So far we have had strawberry/rhubarb/apple crisp, (with our own rhubarb too!), berry surprise cupcakes, (see photo on main page), and strawberry/rhubarb tarts.

The tarts are made with my Grandmother's very own pastry recipe, "Never fail" she calls it, however I beg to differ!

Although this time I think it may have turned out the best yet, I have had many failed experiences in the past. Much to my Grandmother's dismay I'm sure, I am yet to make it like her... I will get there Grandma!

So, my family has suffered through many dense, tasteless pastries, and always they eat with a smile, that's what happens if you put enough sugar in something I guess!
So here it is, Grandma's recipe...... Maybe you will perfect it??

Pastry (Never Fail)

5 cups flour
1 tbsp. baking powder
1 tsp. salt
1 lb shortening
1 egg
1 tsp. vinegar

Mix flour, baking powder and salt. Blend in shortening until it resembles oatmeal. Beat egg, add vinegar to egg and enough water to make it all one cup. Mix with dry ingredients. Roll out.
Makes enough for one pie crust with top.

You can either split it up for tarts in a muffin tray, do a whole pie, or even freeze it! I used half for my tarts and the other half to make a shell for quiche the next night.

Strawberry Filling

Chop up enough strawberries to fill your tarts or pie, coat them liberally with flour and sugar and put them in the uncooked pastry. I baked mine at 375 until they were bubbly and the pastry is light golden.

TIPS!!! After many failed attempts, this is what I've learned...

Don't use butter for the pastry, butter is not always better!
Don't over mix the pastry, a little unblended as you roll out is good.
I used pastry and cake flour last time and liked it, (but Grandma uses all purpose!).
Don't overcook the pastry, it becomes not so tender-flaky....


Good luck to anyone who tries it and please let me know how yours turned out! I am always looking for new suggestions.

Amateur everything!!

So I have decided to fill my already-full-life up with creating a blog on all the new things I am trying, which lately is a lot!

I have recently, with the help of my wonderful Husband of course, created my very first vegetable garden and so far it has been great, with a few minor exceptions.....

Also, I am now committed to learning how to make Martha Stewart approved cupcakes. After a few dry cakes and sugary icings, I am slowly figuring out how to make those oh-so-yummy delicacies. (Thanks to all my family members for eating my creations so far, and for smiling as you ate them....!!)

On top of these two things, I also am trying to be an all star Mom/Wife to my two Daughters and my Husband. This job takes up every spare moment of every day and I am sure that I will have many trying and funny moments to share!

Oh, and did I mention that I also have a job? Like an away-from-the home, not-a-Mommy job? At least 3 days a week I step away from this house into the adult world, ahhhhhh.... More on this later though!

I will be sharing my great recipes (or disastrous ones), gardening tips that I learn and filling in the rest with the day to day life of an amateur Mother, hope you all enjoy!!